To correct a mistake on a hand written check follow these recommended steps.
- If the wrong expense account was used, go into the GL program and make a journal entry to correct the account used.
- Do not go any further with these instructions.
For other corrections, follow these steps.
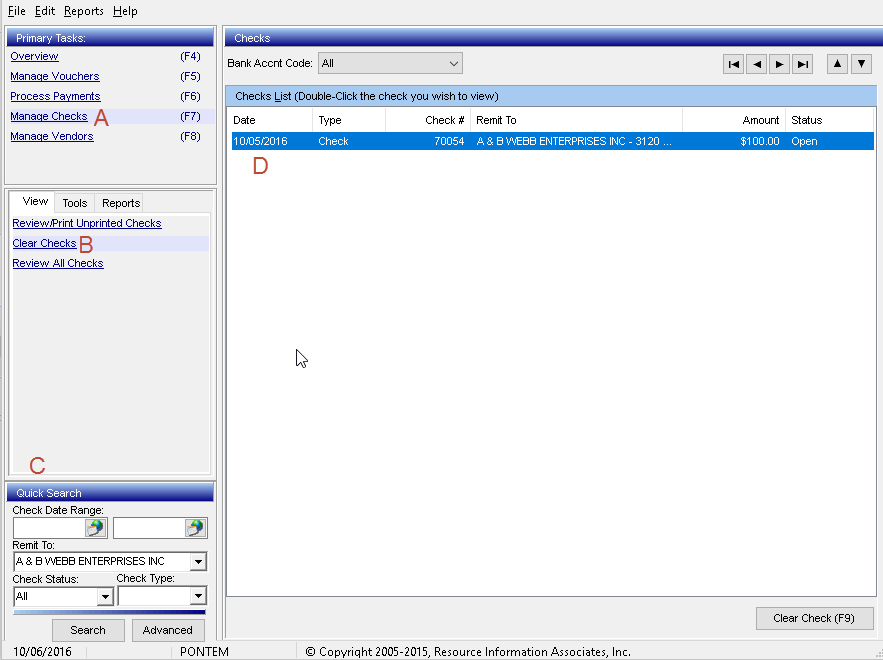
- In the AP program, go to the “Primary Task” box and click on Manage Checks (A)
- Click Clear Checks link on the "View" tab (B)
- (Optional) Use Quick Search to find the check to be edited (C)
- Use the “Check Date Range” and/or “Remit To” fields to limit the search to a specific vendor or time frame
- Make sure to set the Check Status = All
- Click Search button to execute the search
- Double click the check to be edited (D)
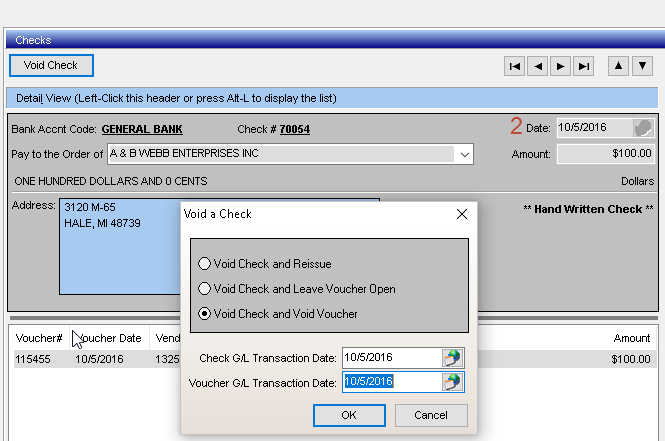
- Click the Void Check button
- The only option will be to “Void Check and Void Voucher” because this is a hand written check
- Make sure the Check G/L Transaction Date = Check Date (2)
- This will default to today's date, so make sure to check the date
- Make sure the Voucher G/L Transaction Date = Check Date (2)
- This will default to today's date, so make sure to check the date
- This will default to today's date, so make sure to check the date
- Click OK button
- Read the warning and click the appropriate response Yes / No
- Read the void confirmation and click OK button
Create a new hand written check with the correct information
- Click the Tools tab
- Click Hand Written Checks link
- Enter the appropriate Bank Accnt Code, Check Date and Check #
- On the new check you will not be able to use the same Check #
- It is recommend to try using the original check number and leave off the first digit
- eg. For check '1682' enter “682”
- Hopefully this will put the check number far enough in the past it does not conflict with another check number
- If this conflicts, another idea for a check number will have to be used. Try not to add digits to the check number as this will put it in the future and could cause problems with a future check run
- Remember letters or symbols are not allowed as check numbers
- Enter the voucher information on the rest of the form
- Once the information is entered, verify it one more time, then click the Save Check button
- Click the Close button to exit the tool
0 Comments